Please wait...
Delivery Servers Warmup Plans
Starting with the version 2.1.10 we added the delivery servers Warmup Plans feature, which was long requested by our customers.
Some background on the "Warming Process"
Delivery server warming is the gradual process of establishing a reputation as a legitimate email sender in the eyes of ISPs (Internet Service Providers).
When an ISP observes email suddenly coming from a new or "cold" (recently dormant) IP address, they will take notice and immediately begin evaluating the traffic coming from that IP.
ISP spam filters look at volume as a significant factor when determining whether or not you are sending spam. Because of this, we recommend that you begin sending a low to moderate volume, eventually working your way up to larger volumes. This gives the receiving email providers a chance to closely observe your sending habits and the way your customers treat the emails they receive from you.
Most reputation systems only store data for 30 days, so you should not go 30 days or more without sending on any given IP. If you do, then you will need to warm it up again. This is why the recommended timeframe for warming up a delivery server is 30 days.
MailWizz's delivery servers Warmup Plans feature description
Here is how our implementation works and what you need to do in order to get started:
- Define and activate your Warmup Plans.
- Attach them to your delivery server and watch them as they progress.
- The hourly cron job will handle setting up the delivery server quota based on the Warmup Plan settings. This is why is crucial to make sure all your cron jobs are properly set.
- You can allow your customers to create Warmup Plans if they have the permissions to manage delivery servers.
- For consistency, once the Warmup Plans are active, they cannot be fully edited anymore. We allow changing only the name and/or the description.
We will describe the way the feature is working and how to set it up for the backend area, but remember, if customers have the rights to manage delivery servers, the same process can be done from the customer area as well.
Once the application is updated to the latest version, a new entry in Backend > Servers menu will be visible, having the name Warmup Plans which allows you to manage Warmup Plans.

We tried to make the plans definition very flexible, which introduced some complexity, but once you understand the process, everything will be very clear.
We will describe in details each option that is defining a Warmup Plan, but we recommend you to read also the tooltips and the info and error messages that can be found in the form for the plan management.
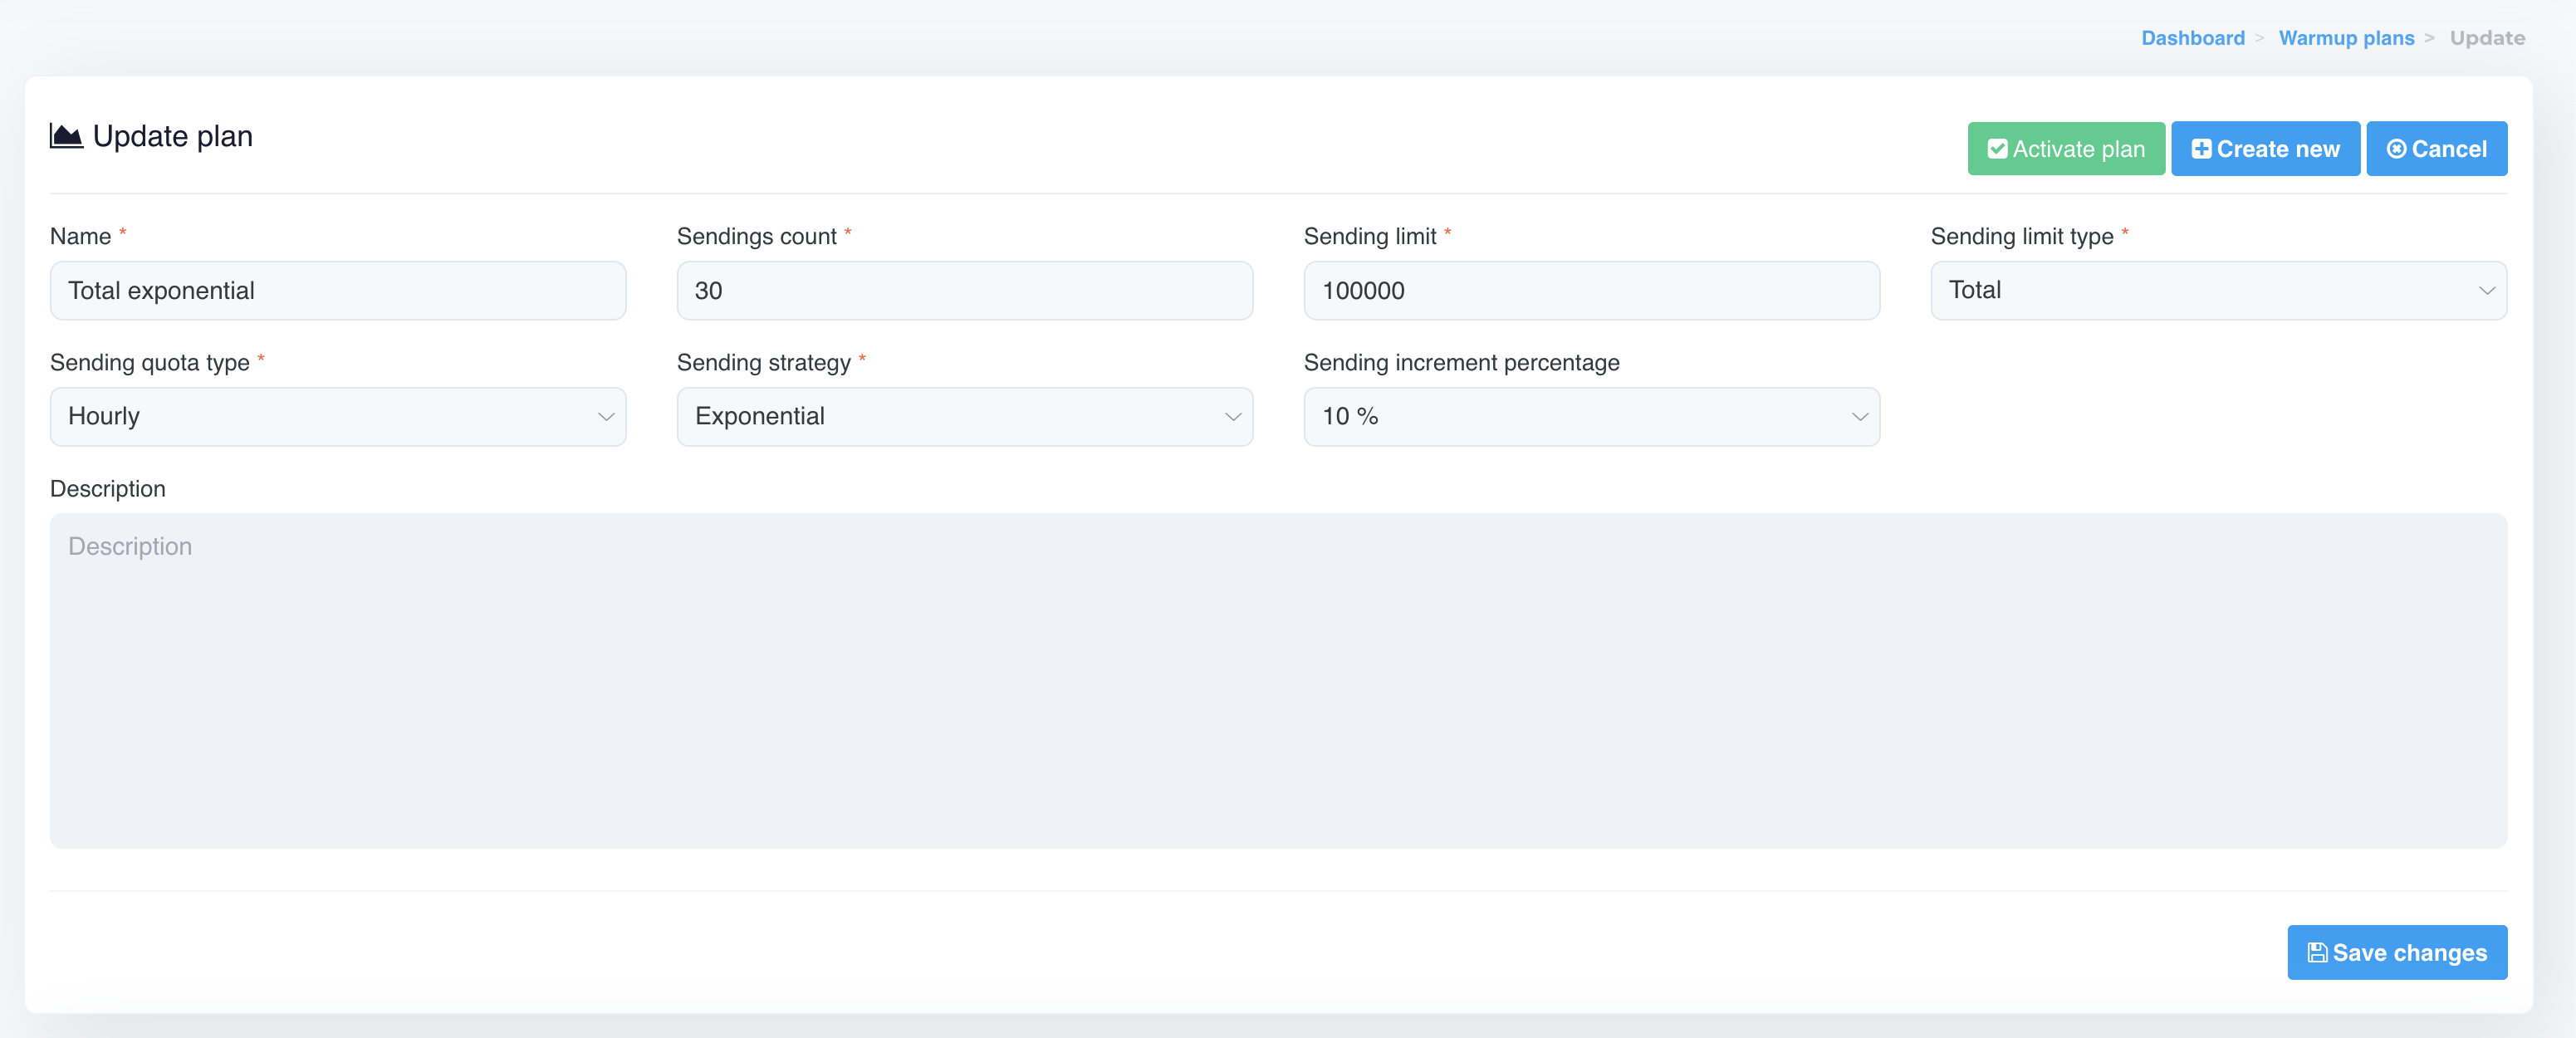
Let's say that you have a plan like the one named "Total Exponential" in the image above. The info for that plan can be read like:
"We will warmup the delivery server by sending emails in 30 batches until all the sending batches summed up will count 100K emails. Each sending will set a hourly quota for the delivery server, and this quota will grow exponentially, one sending after another, by 10%"
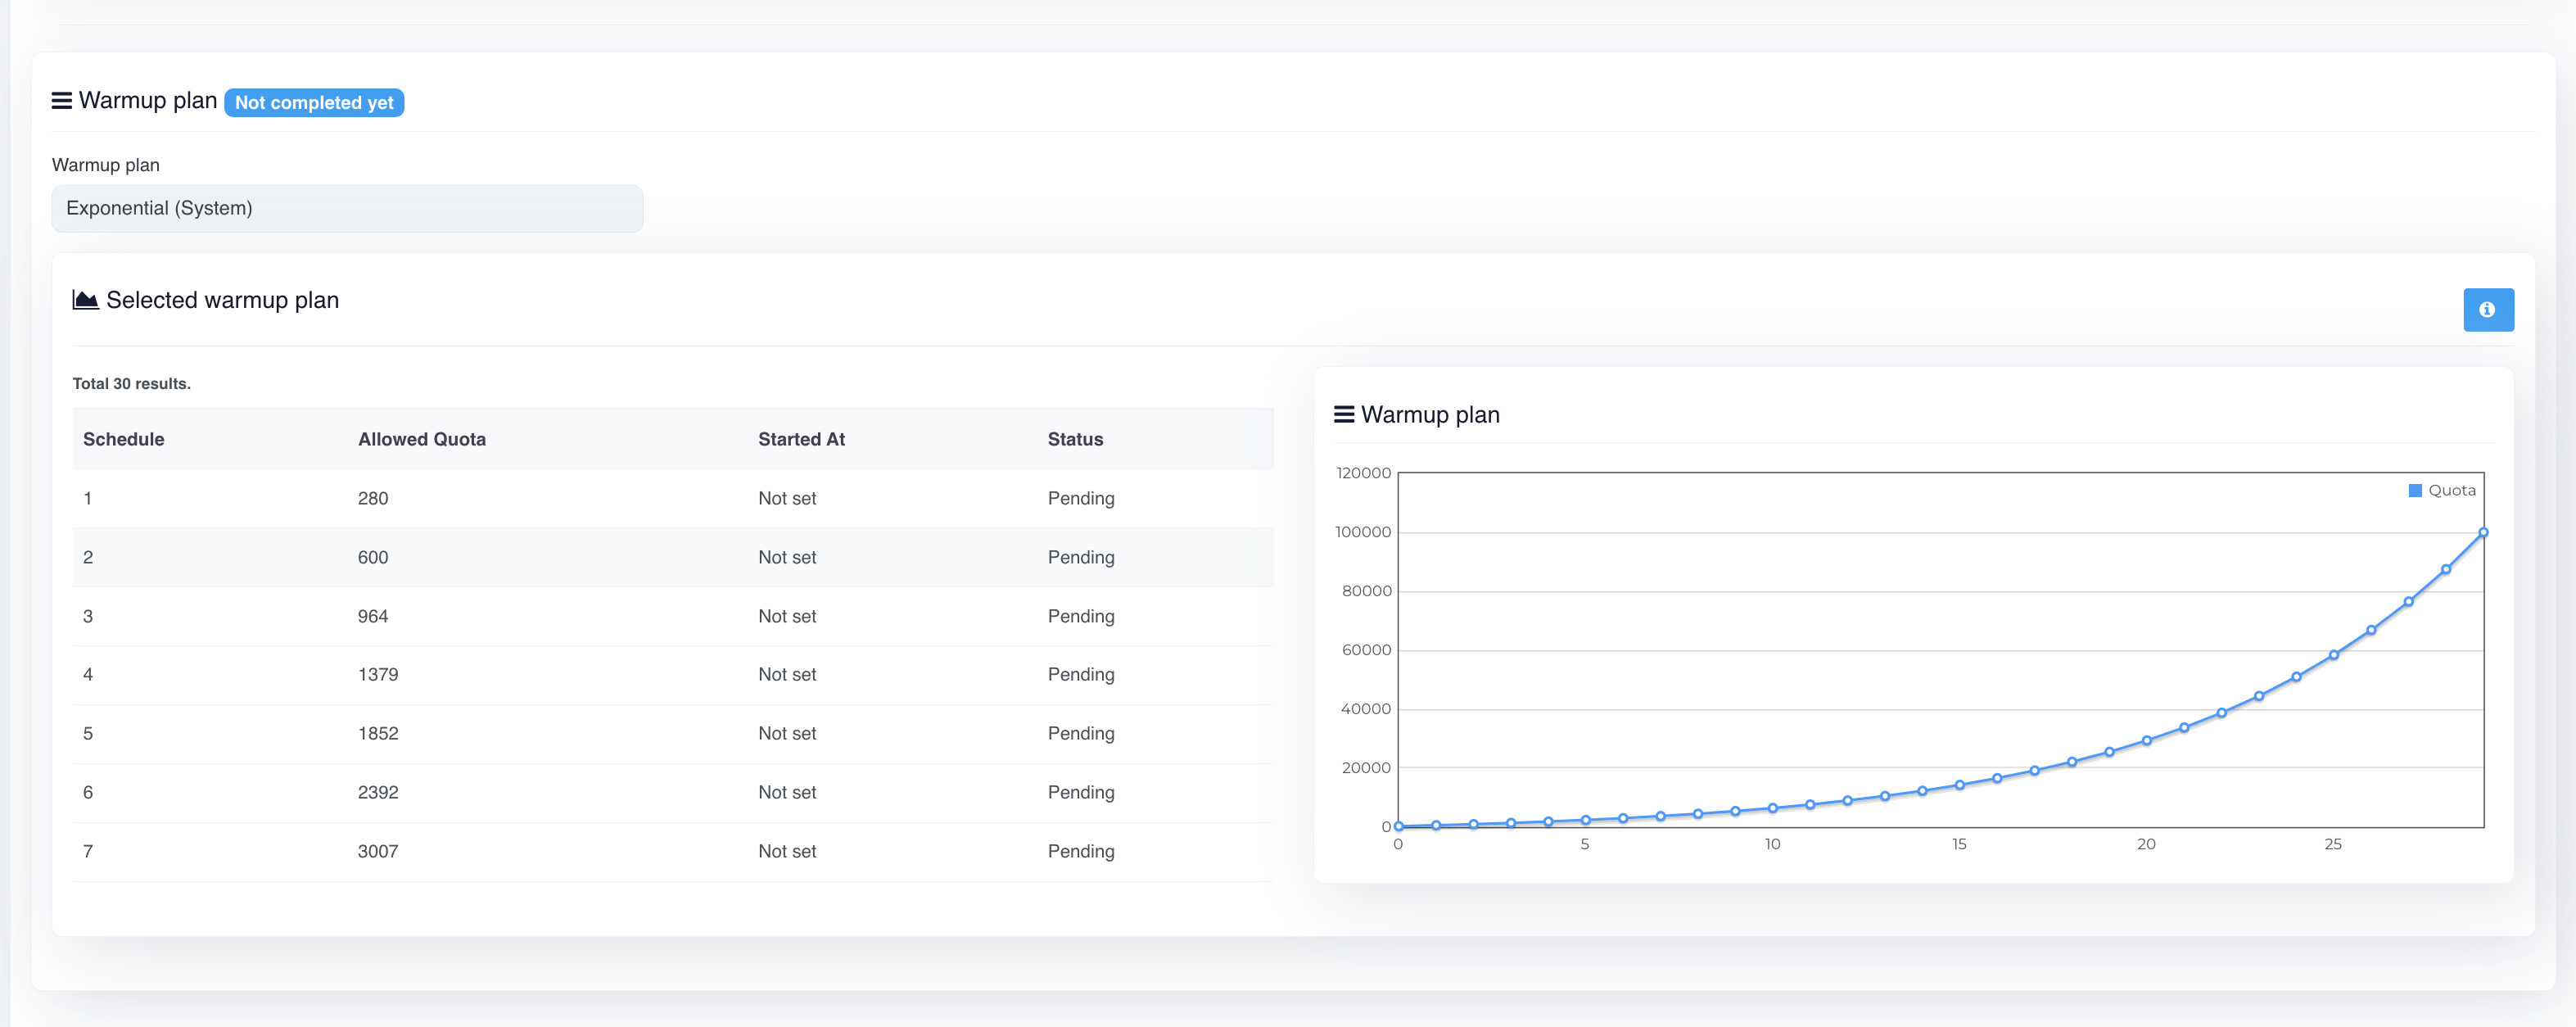
To help you better understand the generated schedule for the Warmup Plan, we made available a table with the quotas and the increments for each sending batch, together with a graph:

Based on the values you choose, the algorithm is calculating the quota for each sending batch.
The "Sending strategy" can have 2 values: Exponential or Linear.
For the Linear value, basically the growth factor will be the ratio between the Sending limit and Sendings count. If we choose as a "Sending limit type" the value Total, that means each sending will have the same quota calculated by the ratio between the Sending limit and Sendings count.
On the other hand, if the value is Targeted, that ratio will be used as the first schedule and then it will be added with each sending.
To easily understand what Targeted and Total means, think as follows:
- Targeted - we will use the value from the Quota column from the generated schedules table for the delivery server allowed quota
- Total - we will use the value from the Increment column from the generated schedules table for the delivery server allowed quota
The graph is showing the values that are going to be used as allowed quota for the delivery server.
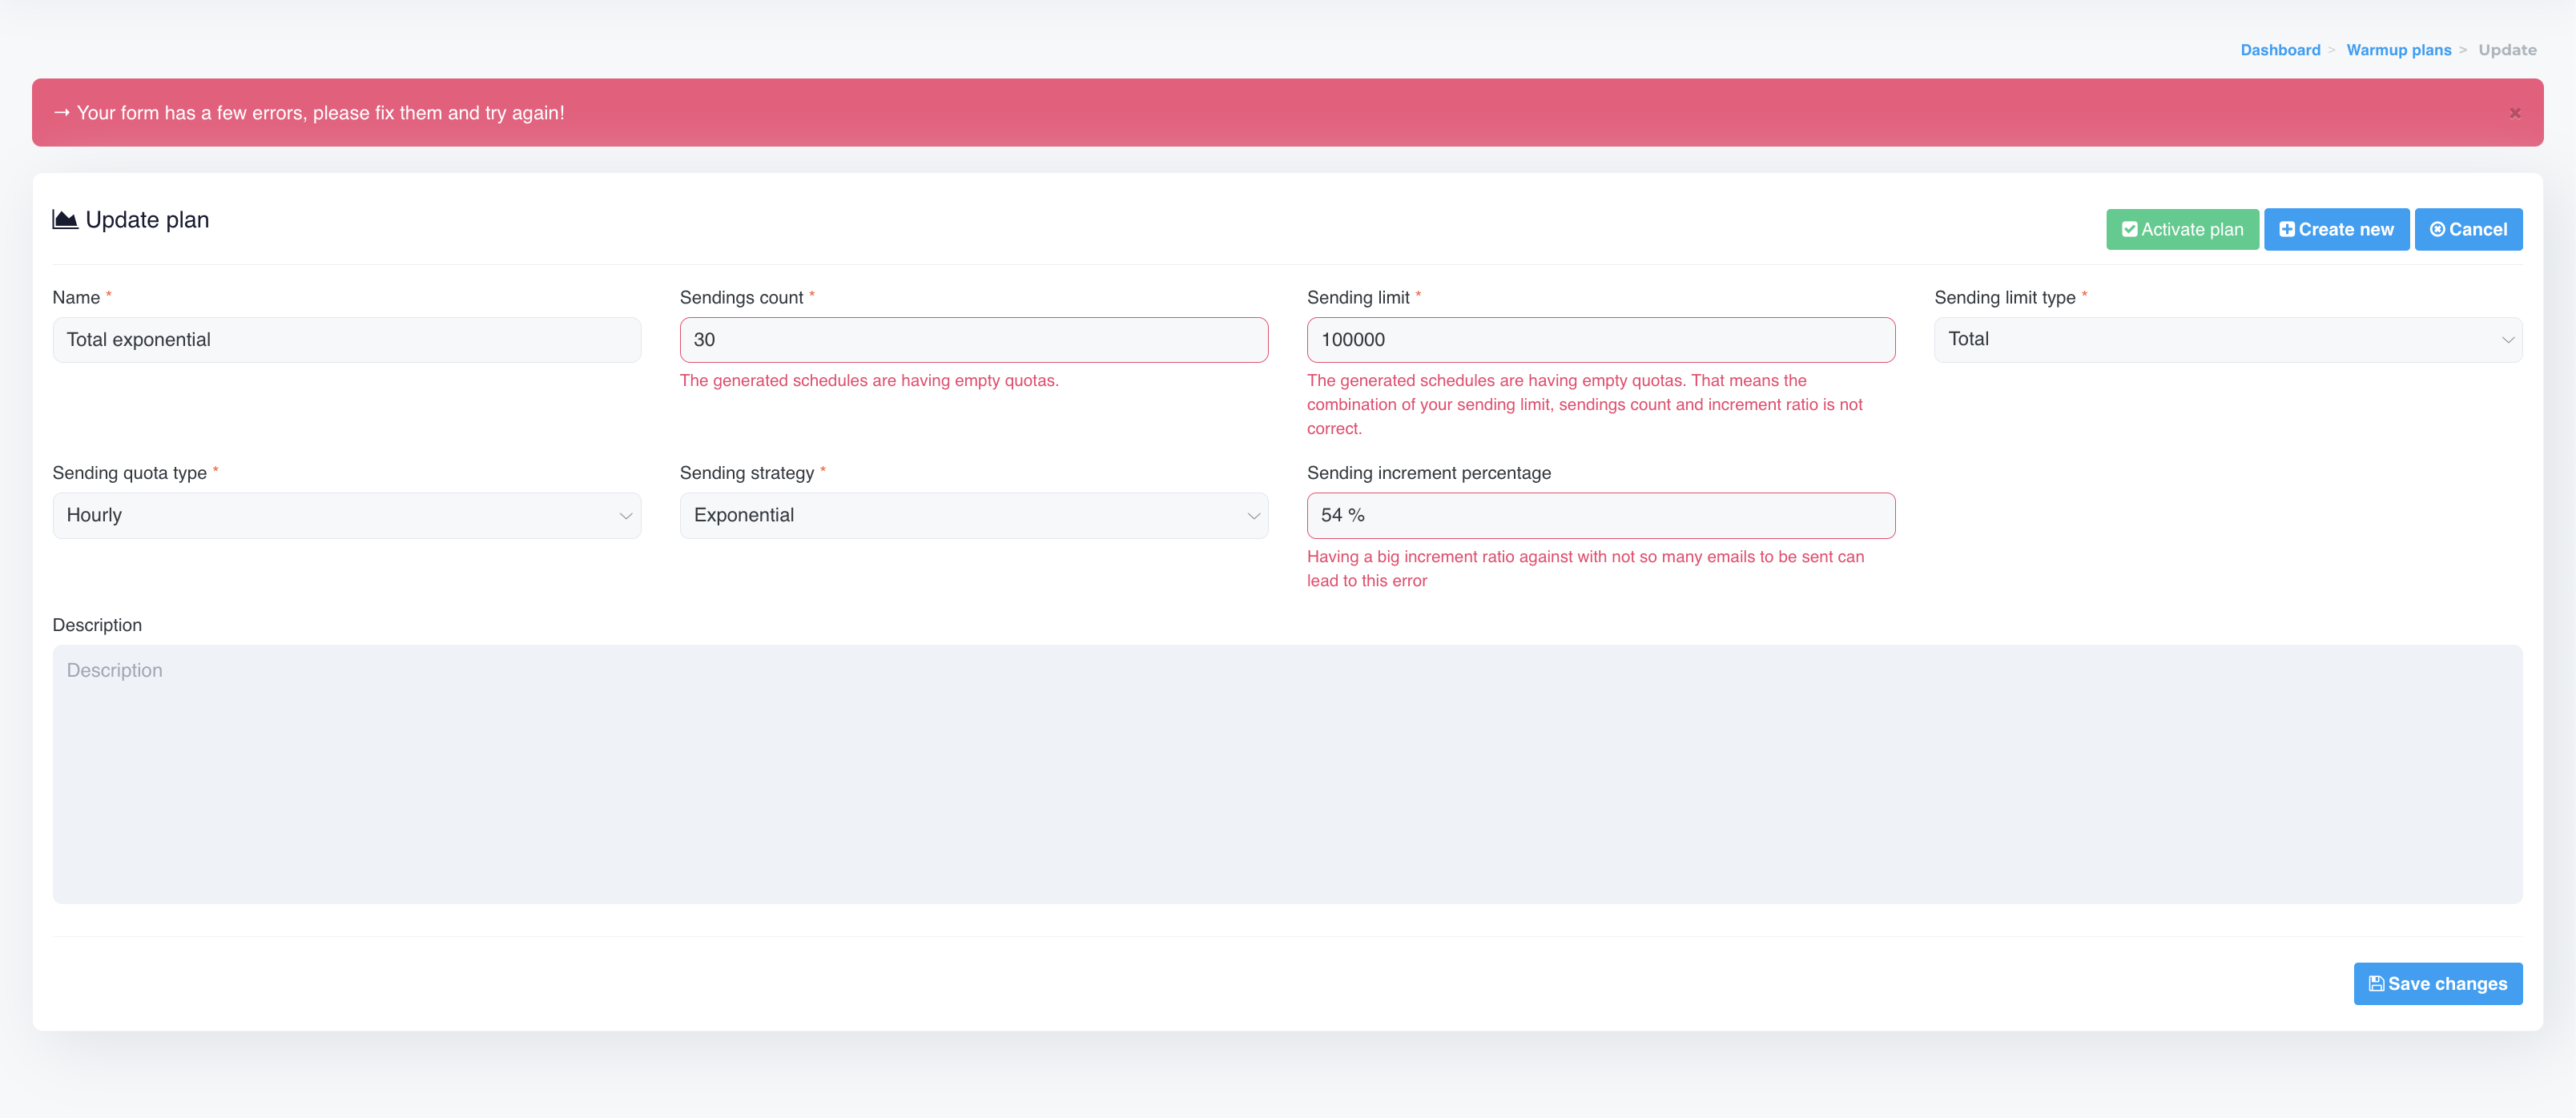
For the Exponential sending strategy, we will be required to set the Sending increment percentage. You will see errors coming up if the combination of the Sendings count - Sending limit - Sending increment percentage will generate empty schedules.
The Sending increment percentage is used ONLY for the Exponential sending strategy. For the Linear sending strategy its value is ignored.
If you want more info about the math used to calculate the schedules quota for the Exponential strategy, here is a resource.
Another important setting is the Sending quota type with its 3 values: Hourly/Daily/Monthly. Once the plan will be attached to a delivery server, this field will be used to set the values for the hourly quota/daily quota/monthly quota fields of the delivery server.
No matter what we will choose here, we will always set the hourly quota on the delivery server. That means if the quota type is daily, we will have, for the hourly one, the value divided by 24.
IMPORTANT - The maximum allowed period is 1 month, which means 30 days, 720 hours.
That being said, the maximum values for the Sendings count will be as follows:
- hourly - 720 will be the max value for Sendings count.
- daily - 30 will be the max value for Sendings count.
- monthly - 1 will be the max value for Sendings count. I think this will never be used, but we have it to be in line with the delivery server quota type.
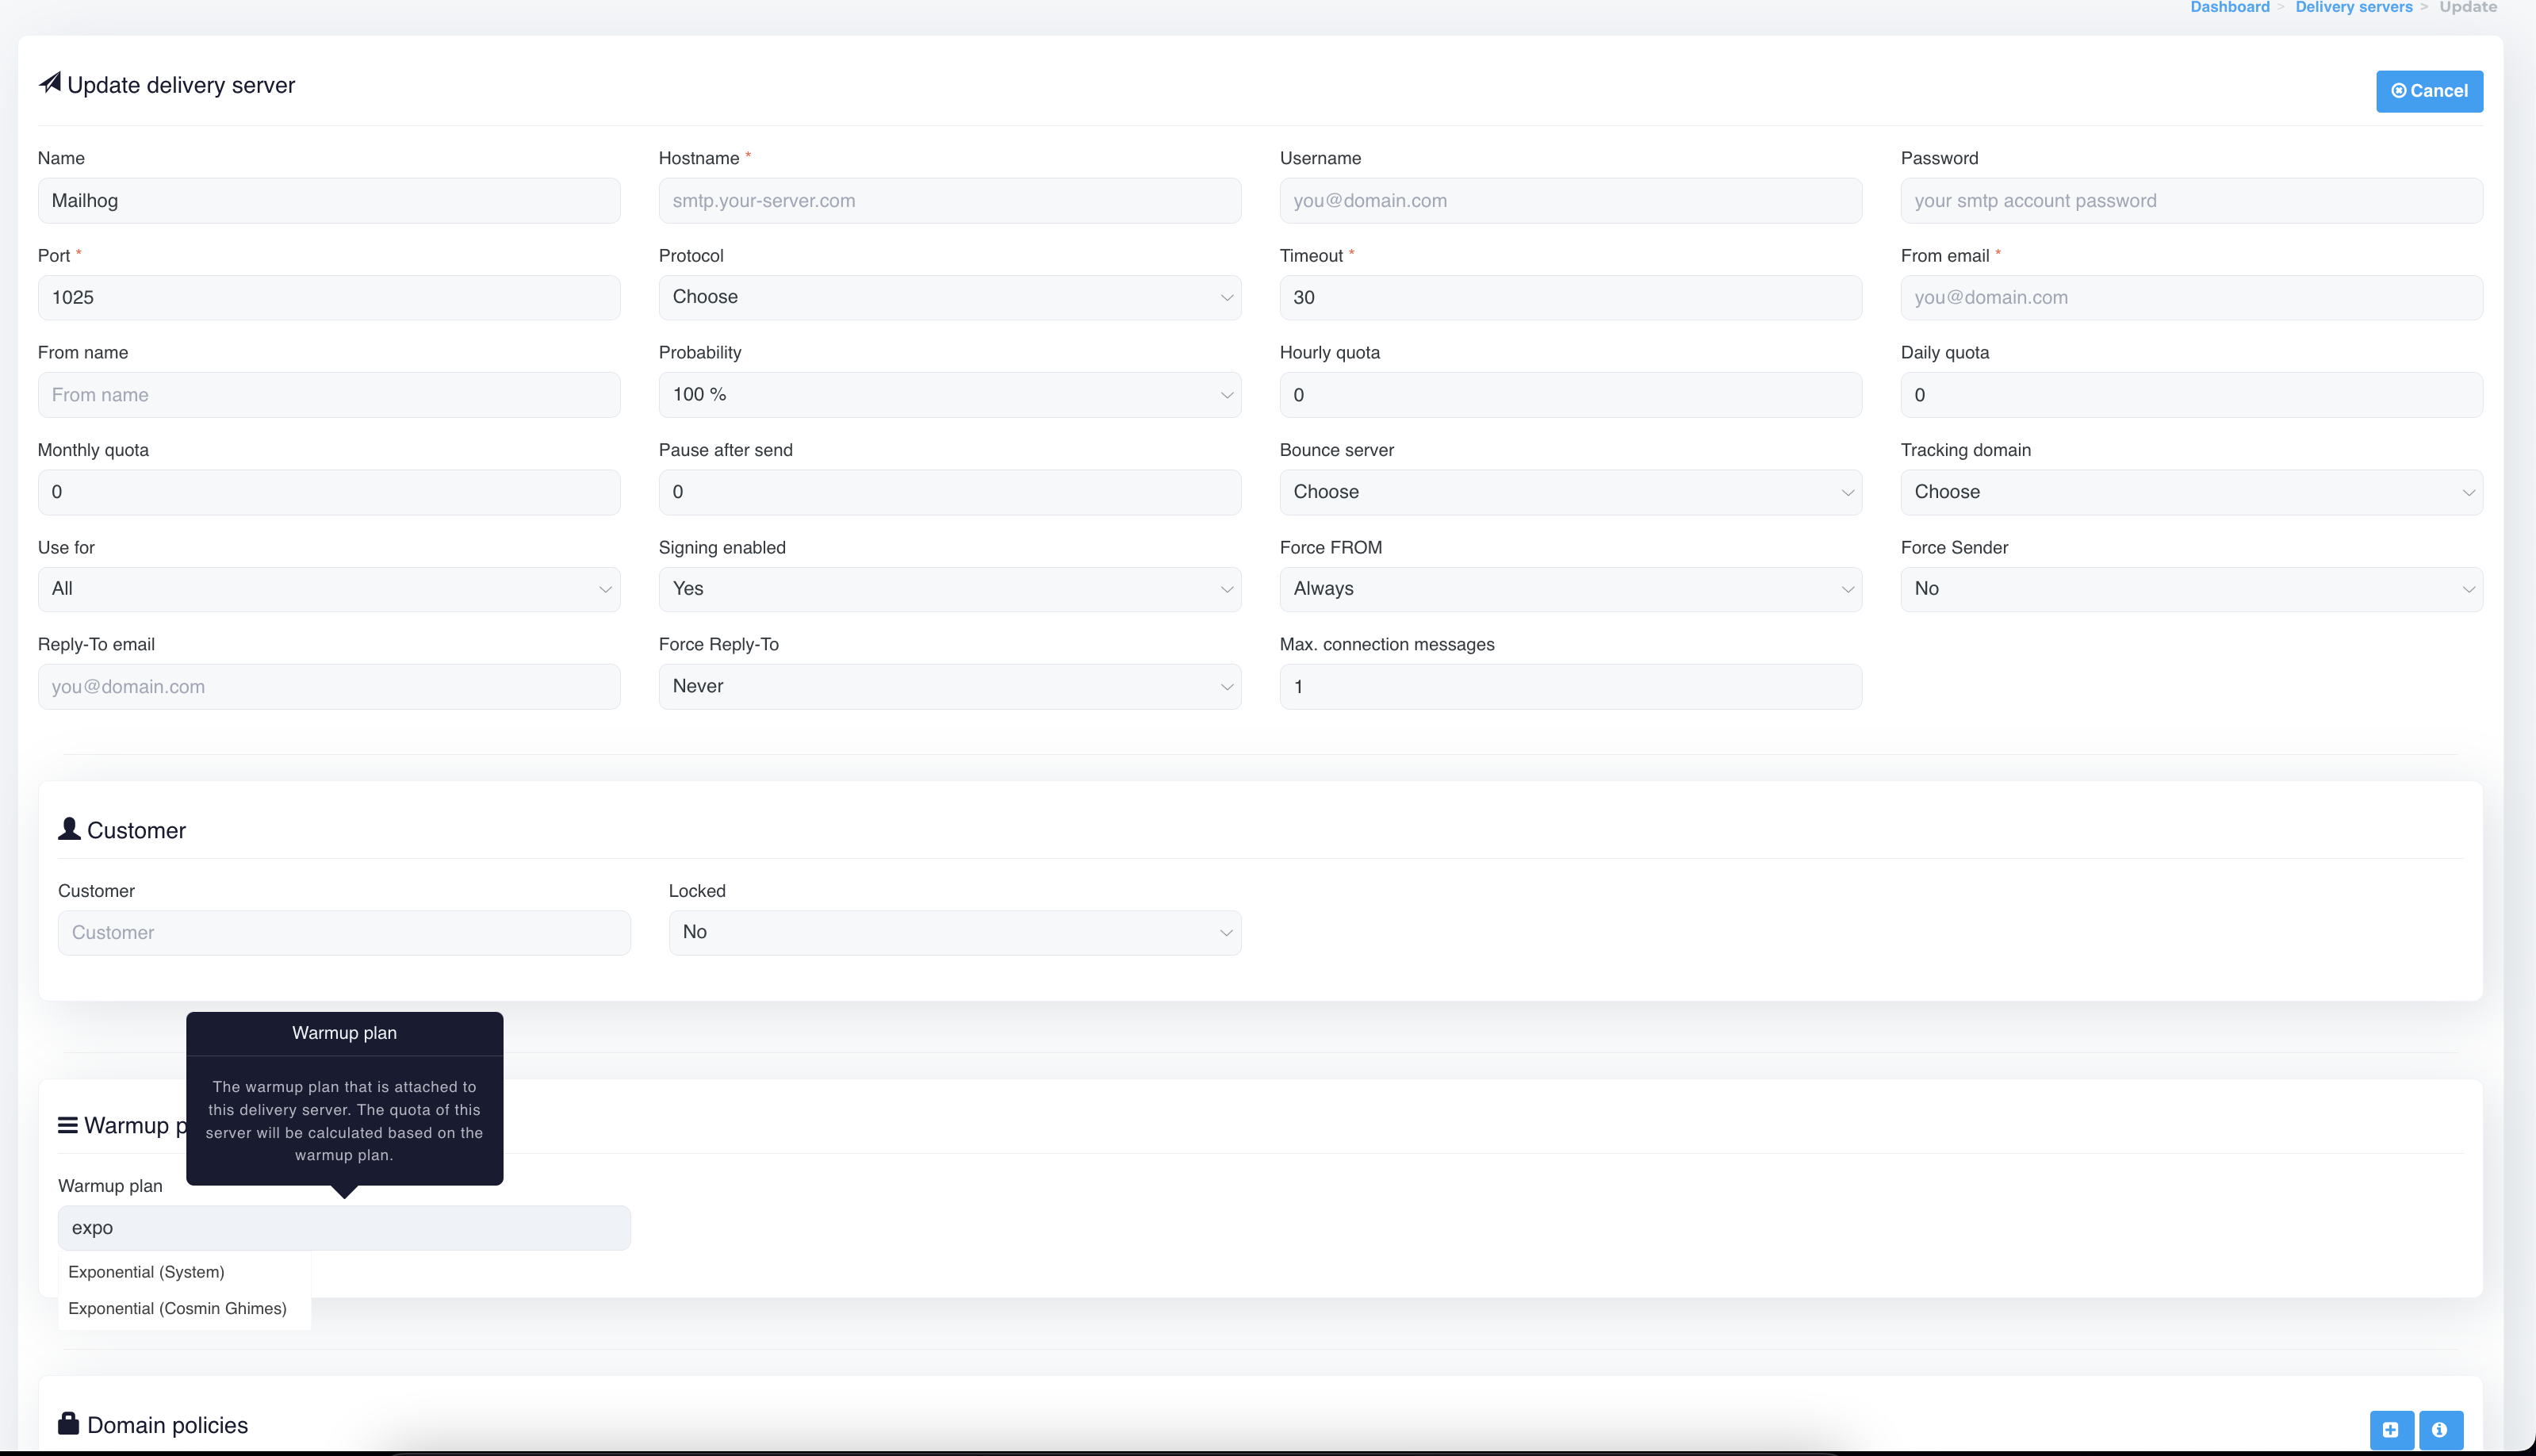
Once you have set and activate a Warmup Plan, it will ba available when editing a delivery server in the Warmup Plan section.
After the plan is chosen, you will be able to see some info similar to the ones when editing a Warmup Plan, but this time you will see the progress of the Warmup Plan for the edited delivery server.
When a Warmup Plan will be attached to a delivery server you will notice that the quota related fields of the delivery server will become inactive like in the image below. That is happening because during the warmup, those values will be set by the hourly cron job automatically.

After the Warmup Plan is attached to the delivery server, you can use the server as usual, but the Warmup Plan will determine the allowed quota.
You are now ready to use the Warmup Plans feature. But here are some common things that you need to remember:
- A Warmup Plan can be used for more than 1 delivery server.
- Once the plan is completed for a delivery server, the server quota will be removed.
- Even if the delivery server will send less than the quota, the system will advance to the next schedule, only after the quota is completed.
- If the sending is paused for a period, the system will resume from same point where it was when it has been paused.
- If we delete a Warmup Plan and that plan is attached to a delivery server, the server quota needs to be adjusted manually afterwards.
- Switching between plans when they are in processing mode is not advised. You should let the Warmup Plan finish all the generated schedules. If you do switch, the current plan will freeze and will resume if you ever use it again with this delivery server.
External links:
https://sendgrid.com/resource/email-guide-ip-warm-up/
https://support.sparkpost.com/docs/deliverability/ip-warm-up-overview
https://docs.sendgrid.com/ui/sending-email/warming-up-an-ip-address