Please wait...
Setup guide for the “Subscribe by email” extension.
After you have installed the Subscribe by email extension, it’s time to set it up properly so that subscribers will be able to subscribe or unsubscribe by email directly, instead of going to a subscription/unsubscription form.
If you go to the Subscribe by email extension settings ( Backend > Extend > Extensions and click on the extension title), you’ll see a page like:

Let’s go a bit over the settings:
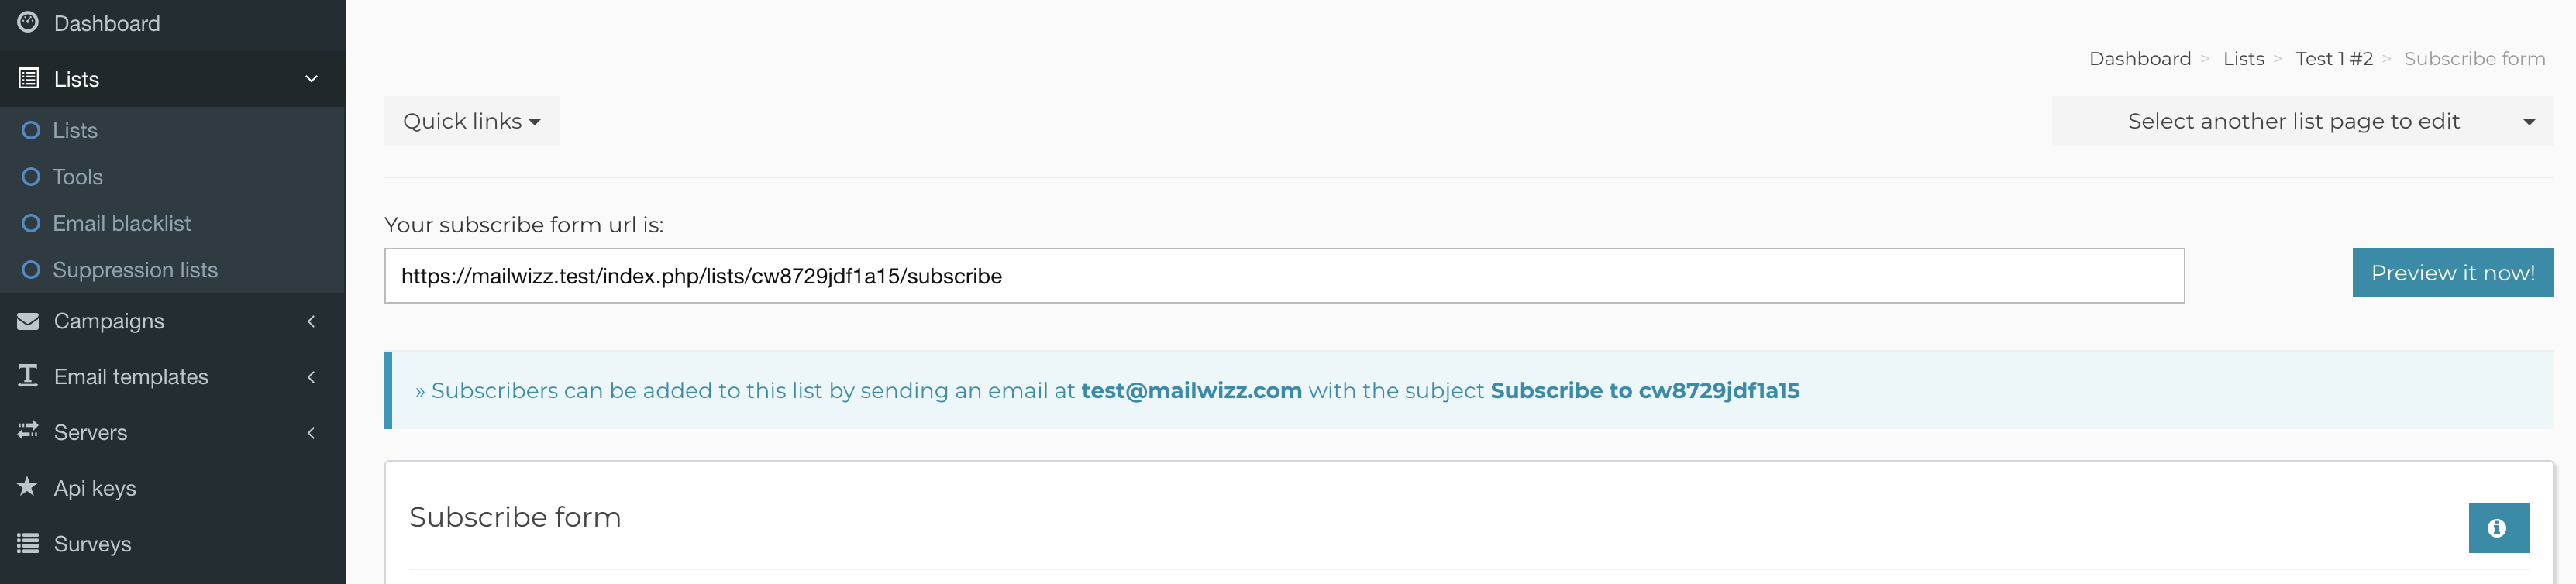
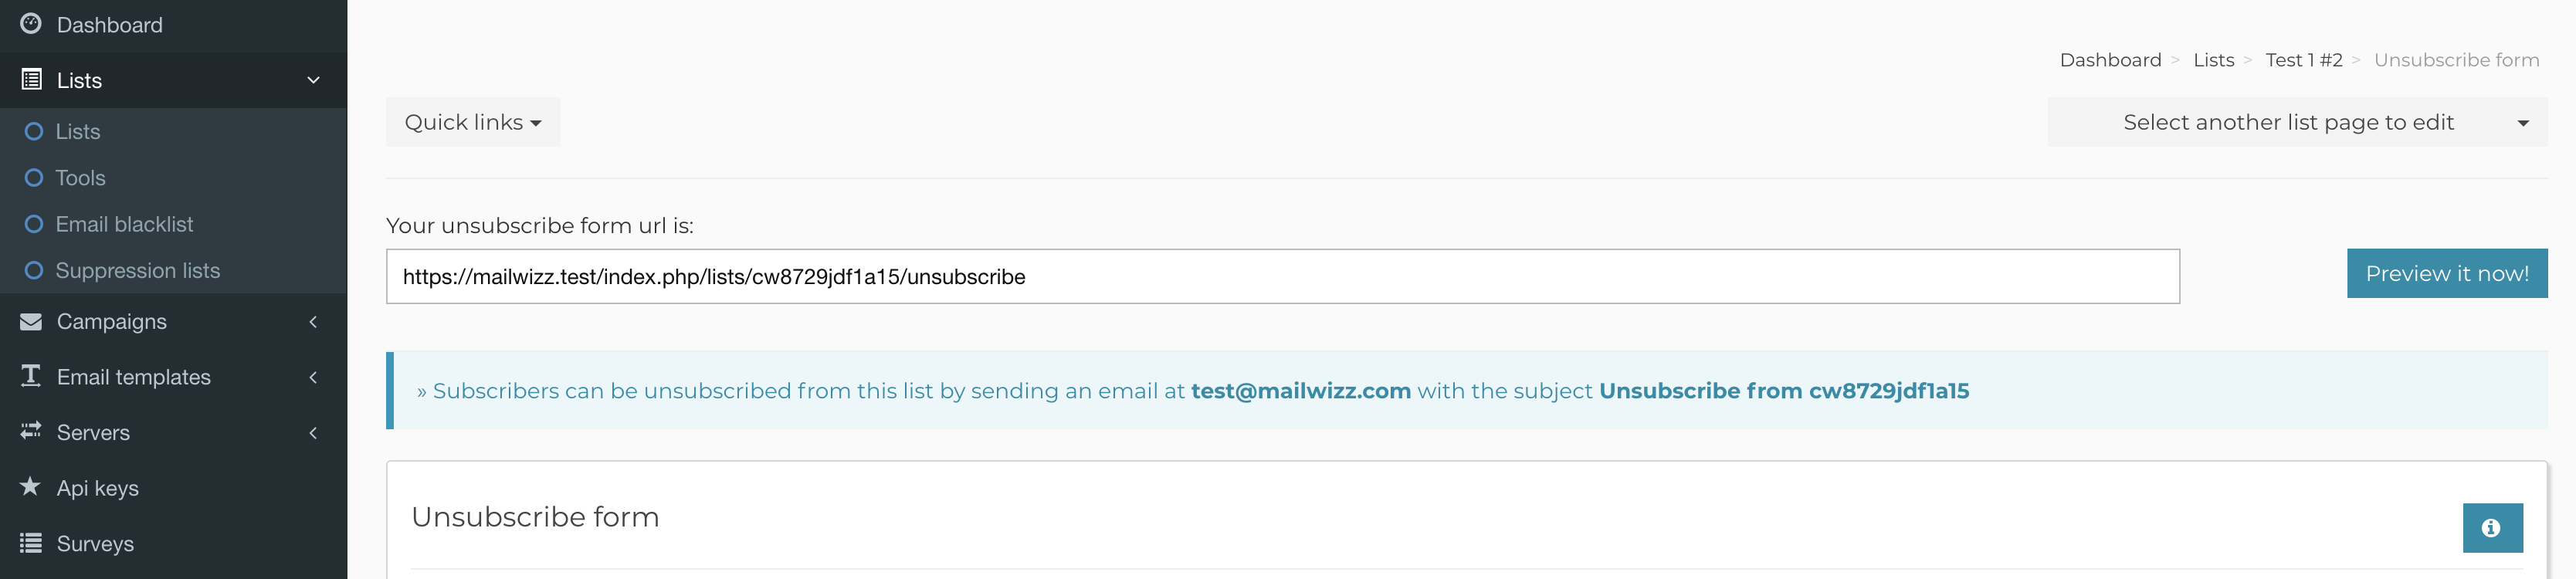
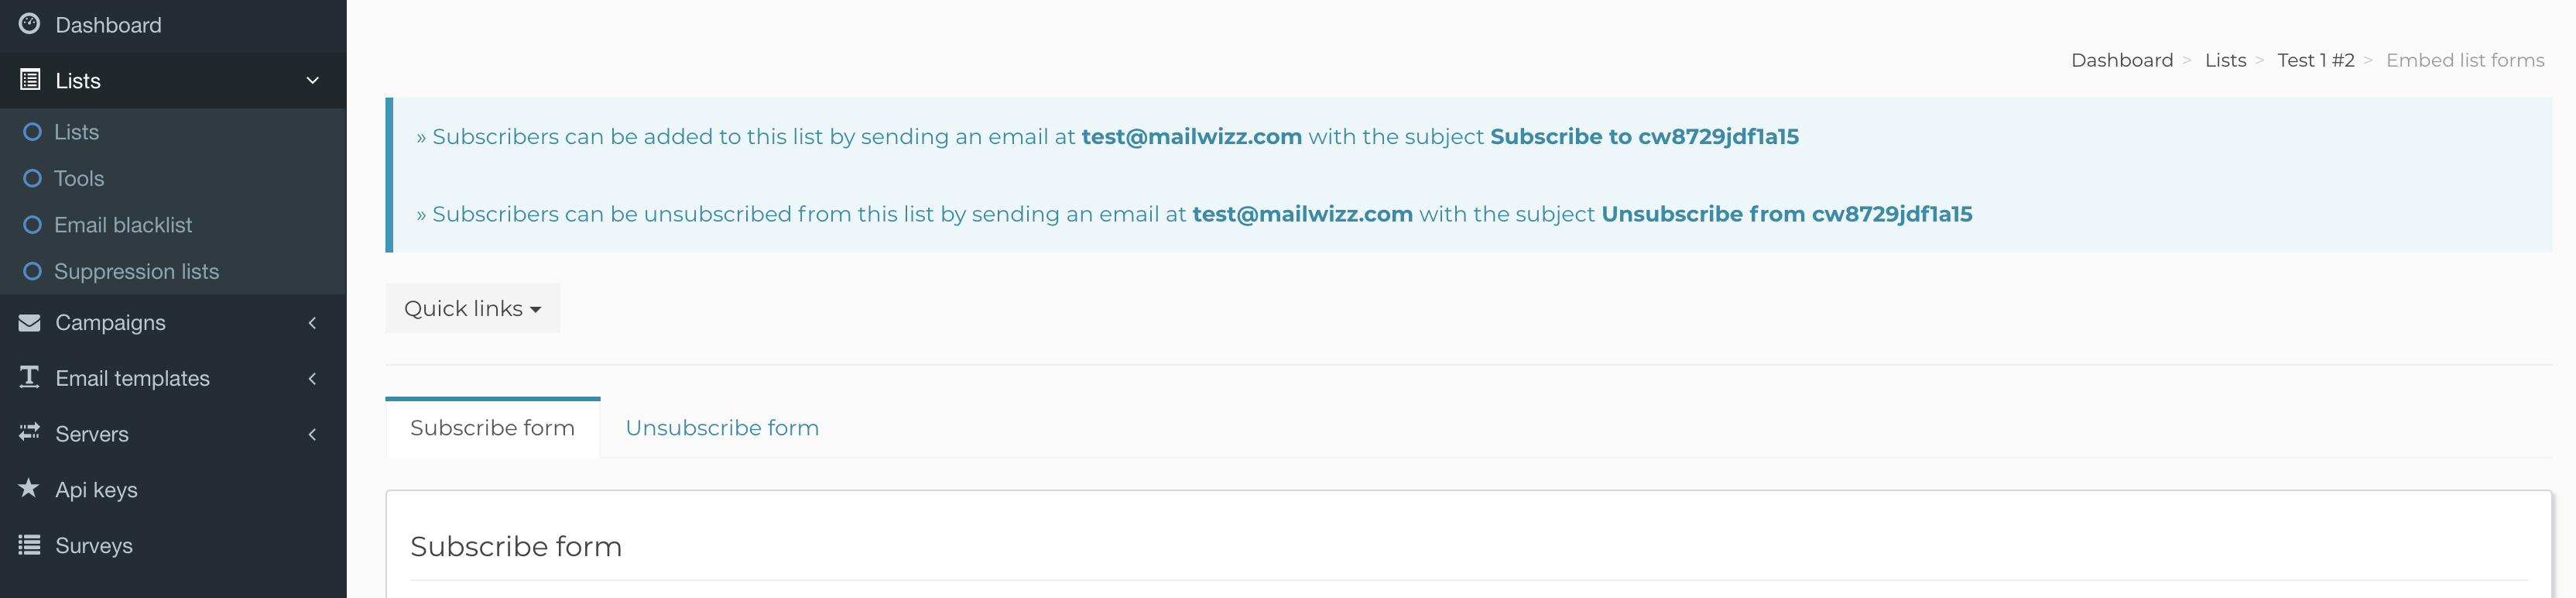
1. Enabled – This actually dictates if the extension is enabled and can hook into the customer area to add info for the customers to see. Such info is inserted in the list pages and list forms, like:
Subscribe page:
Unsubscribe page:
Subscribe / unsubscribe embed forms area:
2. Parse header – This is maybe the most complicated setting to understand and setup.
» If you decide to Parse the SUBJECT header from the incoming emails, then the extension will look in the email subject for the right wording, that is, to subscribe to a list, it expects to find: Subscribe to [LIST_UID] and to unsubscribe from a list it expects to find: Unsubscribe from [LIST_UID]. Here, [LIST_UID] is the unique list id.
» On the other hand, if you select Parse the TO header from the incoming emails, then the extension expects to read emails sent to [LIST_UID]@domain.com with the subject Subscribe for subscribing to a list and the subject Unsubscribe for unsubscribing from a list. Please keep in mind that if you are using this option, you have to have a catch-all email address for your domain in order to catch emails like nk533aq1tm556@domain.com pe511aq1tf213@domain.com etc, so this might be harder to setup on the server side.
» If BOTH options are selected, then the extension will try both in order to detect the list where to subscribe/unsubscribe the subscriber.
3. Email – This is the email address where all the incoming emails will be sent to. This email box in it’s turn, will pipe all incoming emails to the /apps/extensions/subscribe-by-email/worker.php file, see below info for how to do this.
4. Finally - Once you understand all the settings, first thing you have to do is to create an email address that will send all the incoming emails to the /apps/extensions/subscribe-by-email/worker.php file.
This is called email piping. This article explains how to do it for various email servers and control panels. If you are using CPanel you are in luck, it is the easiest way to pipe the incoming emails to a php script.
Here’s how you do it for CPanel:
Login in Cpanel and locate the Mail section:

Then click on the Forwarders icon. From next screen, click the Add Forwarder button and fill in the fields like:

That’s all there is to it. Save the changes and you are all done.
After you create this forwarder, make sure you insert the email address in the extension settings and save the changes.
The above will make sure we can process all incoming emails with our /apps/extensions/subscribe-by-email/worker.php script and based on the email subject we can detect the list where the subscriber needs to subscribe or unsubscribe from.
If from the extension settings, for parse header setting we select “Parse the TO header from the incoming emails” or “BOTH” then beside the above steps, we also have to make sure the email address lists@domain.com is a catch-all email address. I found most of hosting companies don’t like allowing creating catch-all email addresses because of spam issues.
However, for CPanel, here’s some links to guides to help you create one (or you can even ask your hosting company to do it for you, maybe they can help)
https://uk.godaddy.com/help/setting-cpanel-email-default-addresses-8862
Now that all the settings are in place and the email piping is done properly, we need to make sure the file /apps/extensions/subscribe-by-email/worker.php is executable. You can make it executable by logging into FTP, navigate to apps/extensions/subscribe-by-email folder and chmod the worker.php file to 0755 (or 0777 on some hosts). If you have ssh access to your server, running the command:
chmod +x apps/extensions/subscribe-by-email/worker.php
will do the trick.
The way your server operating system knows how to execute the file /apps/extensions/subscribe-by-email/worker.php is by looking at the file header which contains instructions on where the PHP CLI binary is located on your server. If you open the file, first few lines will look like:
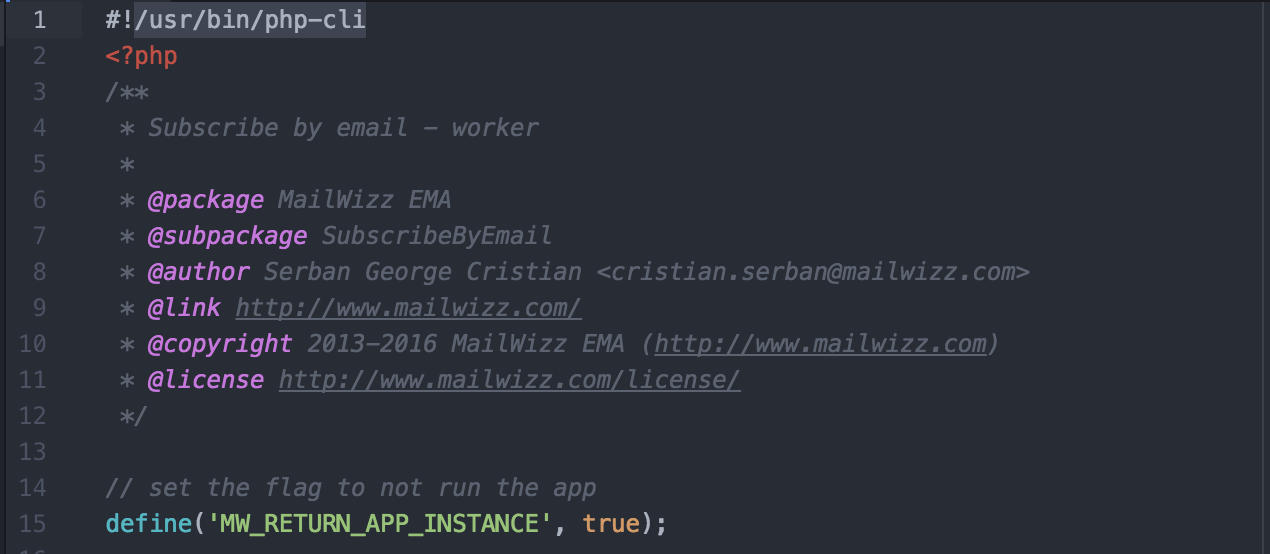
As you see, the first line instructs the script file to use the PHP binary located at /usr/bin/php-cli to execute the file. This works fine in 90% of cases, but there will always be edge cases where this will fail. If that’s the case, you’d need to access your server via SSH and find out what is the real path to PHP CLI. You can do that by running the command: command -v php:
mygdim1@nlss3 [~]# command -v php
/usr/local/bin/php
mygdim1@nlss3 [~]#
And we need to make sure that is the CLI binary:
mygdim1@nlss3 [~]# /usr/local/bin/php -v
PHP 5.5.36 (cli) (built: May 26 2016 19:54:12)
Copyright (c) 1997-2015 The PHP Group
Zend Engine v2.5.0, Copyright (c) 1998-2015 Zend Technologies
    with the ionCube PHP Loader (enabled) + Intrusion Protection from ioncube24.com (unconfigured) v5.1.1, Copyright (c) 2002-2016, by ionCube Ltd.
    with Zend OPcache v7.0.4-dev, Copyright (c) 1999-2015, by Zend Technologies
    with Zend Guard Loader v3.3, Copyright (c) 1998-2014, by Zend Technologies
mygdim1@nlss3 [~]#
So indeed that is the CLI binary(we see the (cli) wording in the command output), so now we know that /usr/local/bin/php is the right path, so we edit the /apps/extensions/subscribe-by-email/worker.php file and we change the first line to look like:
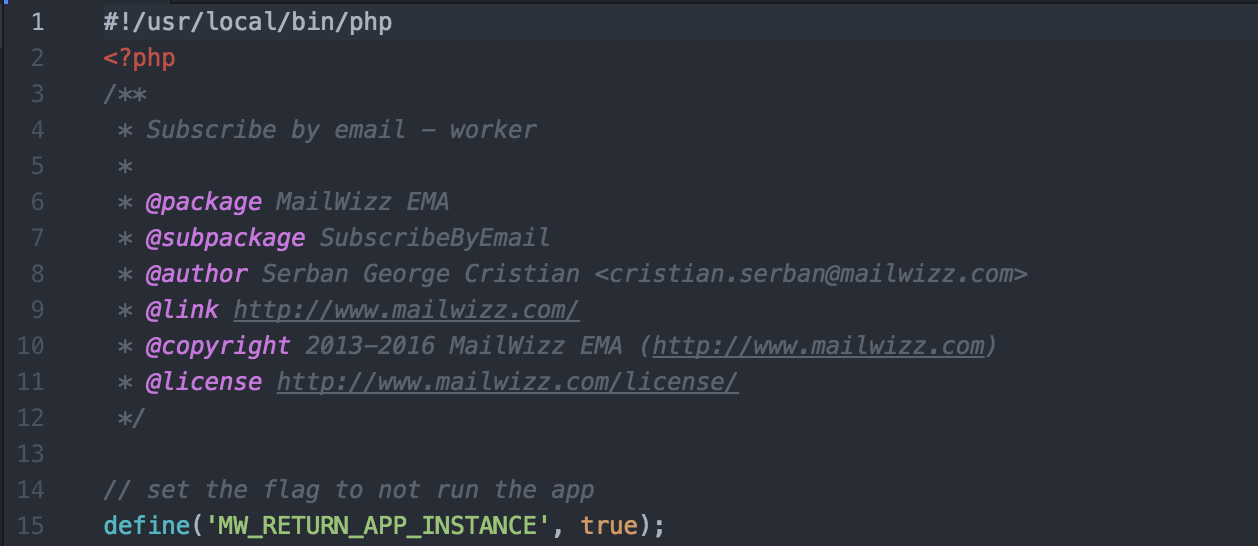
That is, instead of #!/usr/bin/php-cli our first line became #!/usr/local/bin/php
Your own path might vary, instead of /usr/local/bin/php, the command -v php command can return /usr/bin/php or /usr/bin/php-cli.
Now we can assume all the settings are right, so we can test the implementation by logging into MailWizz as a customer, going to an email lists, click on the List Pages box and follow the subscribe by email instructions.